
New casting trees may be created using the Create new button located above and below the grid, and editing existing casting trees may be done either by clicking a CT code from the grid or by using the Edit icon located at the end of the CT row.
Adding or editing a casting tree from the list brings up the Casting tree detail form, where the following data entry sections are available, and the following casting tree information may be specified:
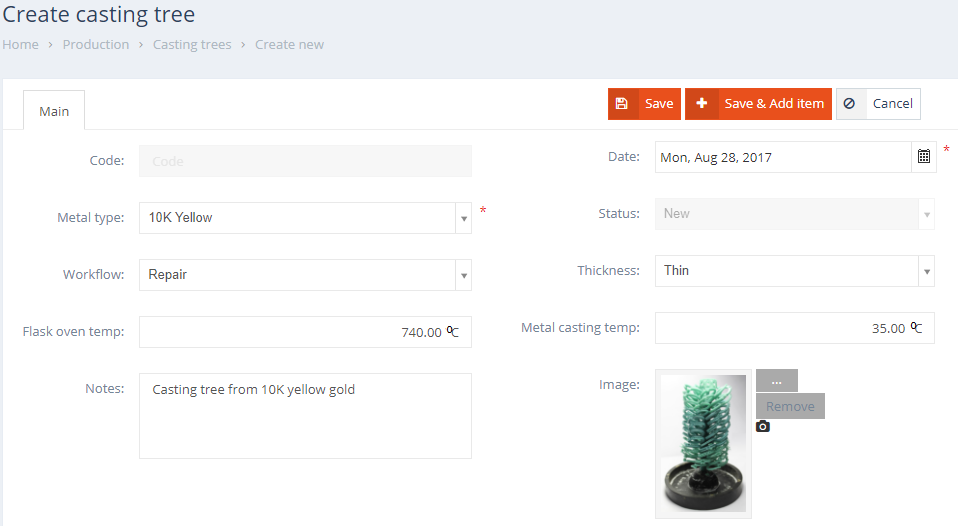
Casting tree details form – main info
Main info section displays general information related to Casting Trees, such as:
- Code: a unique, read-only Casting Tree code generated automatically by the system.
- Date: specifies the creation date of the CT.
- Metal type: specifies the metal used to cast the tree.
- Status: displays the current status of the CT. The status of new CTs is set to New by default.
- Workflow: specifies which Workflow is used for the CT. Once a service group is selected and CT os saved, its associated services are added under the Services tab.
- Thickness: displays information about the thickness, which may be useful for the caster.
- Flask oven temp.: displays the oven temperature that should be reached.
- Metal casting temp.: displays the metal temperature that should be reached. This value defaults to the casting temperature assigned for the master alloy from Metal type management under the Inventory menu.
- Notes: any notes may be added to the CT.
- Image: displays the image assigned to the CT.
Estimated weights are calculated using the default measure unit of the selected metal type.
- Wax weight: specifies the weight of the wax casting tree. This value is used to calculate the metal weight needed to cast the tree.
- Metal weight: the weight of the metal, calculated from the wax weight.
- Button weight: displays the button weight. This part of the casting tree is not filled with metal, and is subtracted from the Metal Weight, resulting in the Total Metal Weight which represents the final metal weight required for casting the tree.
- Extra casting metal weight: displays the amount of additional metal used to compensate for any loss due to burning or other causes, and which is necessary in order to obtain a good cast.
- Total metal weight: displays the total metal weight assigned to the tree.

Casting tree details form – Estimated weights
After saving the Casting tree, using the Save & Add item button, items can be added to CT. Job items may be assigned to CTs by scanning the job code or selecting them from the Job order drop-down. Multiple job items can be selected.

Add item to CT
Selecting a job item brings up the Items grid, where the following options are available and the following information may be specified for the new CT items:
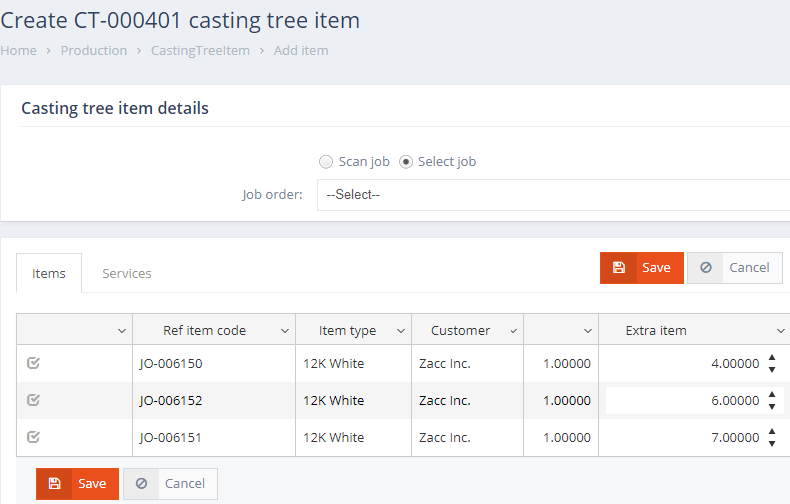
Add item to CT
- Checkbox: if checked, the job item will be added to the CT
- Ref. item code: displays the job item’s reference code.
- Item type: displays the job item’s item type.
- Customer: displays the job item’s customer.
- Quantity: displays the job item’s quantity.
- Extra item: specifies the additional item quantity which should be cast on the CT.
- Delete: can be used to remove a job item from the grid.
The Services tab can be used to specify which Services are added to the CT. Once all required items have been added on to the grid, using the Save button assigns the job items to the CT. Using the Add items button further job items can be added to the CT. The Reset button next to the Add new item button can be used remove all of the CT’s items and services.

Job items added to CT
The Services panel is made up of a grid containing information about the services assigned to the Casting Tree. The Service name displays the name of the CT’s Service, and the Status column displays the status of the associated CT Service. Available statuses: ‘New’, ‘Processing’, ‘Finished’.
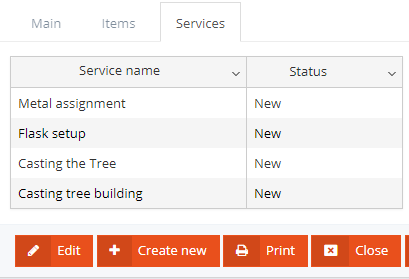
CT’s services
Casting tree actions
Several service actions can be performed while processing CTs. Similar to Job orders, Casting Trees can also be routed through their assigned services using the Move button located in the CT details form and CT grid (move icon). Once a CT has been routed through its final service, the CT’s Status is automatically changed to Finished. Additionally, CTs can be Opened and Closed using the Close/Open buttons in the CT details form. Closing a CT sets its status to Closed, while opening a CT assigns the CT its previous Status (before the CT was closed).