
New users may be added using the Create new buttton or ![]() icon, which brings up the User details form. This form is split into four tabs:
icon, which brings up the User details form. This form is split into four tabs:
User info
This tab contains fields related to general user information, such as:
- Category: Assigns a user to a category in order to easily distinguish between certain levels of access. Apart from its informative value, it serves no additional role in user security. Permissions and rights for using or viewing modules and adding or modifying data are set in the Group module.
- First name: specifies the user’s first name.
- Last name: specifies the user’s last name.
- Username: specifies the username. Usernames are unique and duplicate usernames cannot be added to the system.
- Email: specifies the users’ email address.
- Password: specifies the user’s password.
- Confirm password: a confirmation of the previously specified password.
The required complexity of usernames and passwords can be adjusted from the Security Settings form. The default settings are:
- Username: Minimum 5 alphanumeric characters.
- Password: Minimum 5 arbitrary characters.
- Disabled: if checked, the user is restricted from accessing the system, however the account is not permanently deleted and can be made active again. Disabled users cannot log in to PIRO Fusion and are not displayed in the user lists of various forms.
- Locked: The user becomes locked when they mistype their login password 5 consecutive times (this limit can be adjusted). Locked users are not able to login until their user is unlocked. Locked accounts can be unlocked from the User’s detail form, by unchecking the Locked checkbox and saving the change.
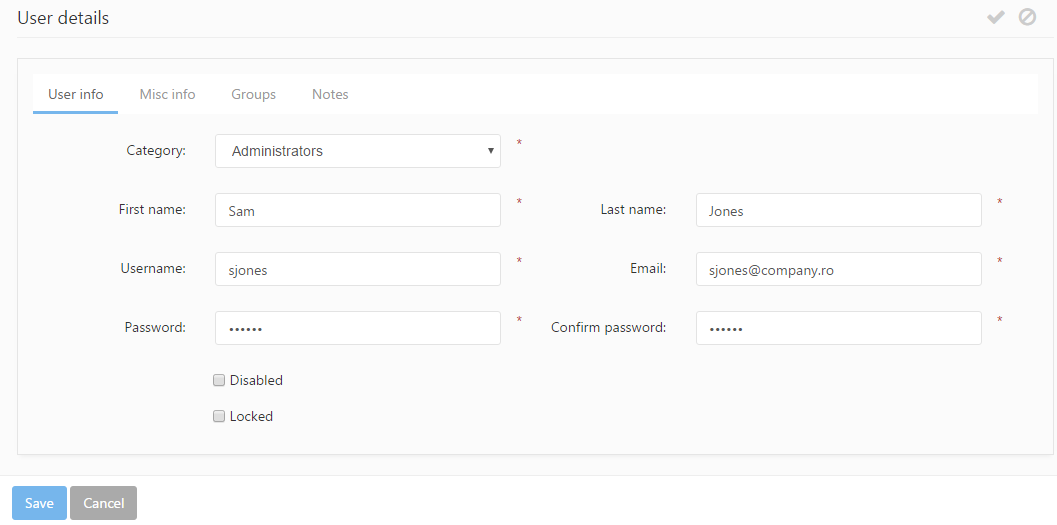
User info tab
Misc info
The Misc info tab contains miscellaneous user information, such as the phone number, login count, profile image, etc.
- User image: A profile image of the user can be uploaded here.
- Must change password on next login: If checked, the user is required to change their password upon their next login. This option is unchecked automatically once the password is changed.
- Remember last module at startup: If checked, PIRO Fusion saves and remember the last used module upon exit, and loads it upon the next login.
- Customer sales representative: If checked, the user is set as a customer sales representative. Sales reps can be assigned to customers and create sales orders for them. In PIRO Fusion, it is possible to create a sales order with multiple sales representatives. Sales reps can be persons outside the company and can only view those jobs which are related to their customers and which have been converted from their sales orders.
- Customer representative: if checked, the user is set as a customer representative and can be selected from a predefined list of customer reps when Job orders and Sales orders are created. Customer representatives are employees who keep in contact and interact with the company’s customers.
- Phone: specifies the user’s phone number.
- Labor rate: specifies the user’s hourly rate. Some reports use labor rate values saved on user profiles. When this is not specified on the user, the labor rate of the activity type is used to calculate the total labor cost for the specified period.
- Description: any description may be added to the user.
- Scanner code: specifies the scanner code assigned to the user. Scanners can be assigned to users, and on forms where the user typically has to select a scanner which will be used to scan the barcodes of items, envelopes ect., the scanner selection process will not be necessary. Assigning a scanner to a user makes the routing process more fluid and efficient.
- Login count: indicates the user’s total number of logins.
- Last login: indicates the date of the user’s last login.
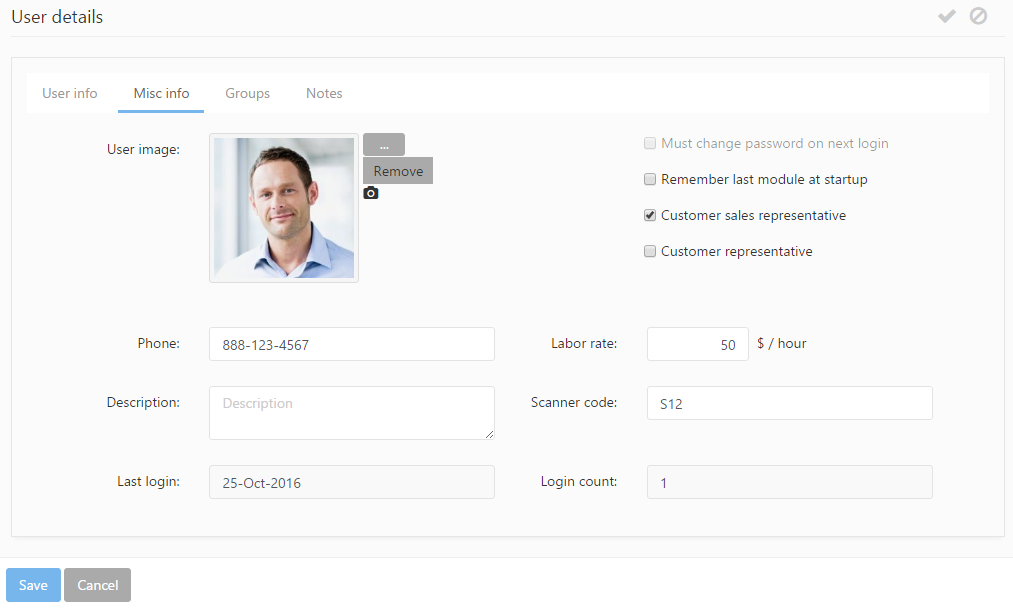
Misc info tab
Groups
Rights and permissions may be managed by adding users to groups with roles assigned to them. More details are available on the Groups page. The Groups tab contains two checklists, and PIRO Fusion platform’s security groups are listed in the first checklist.
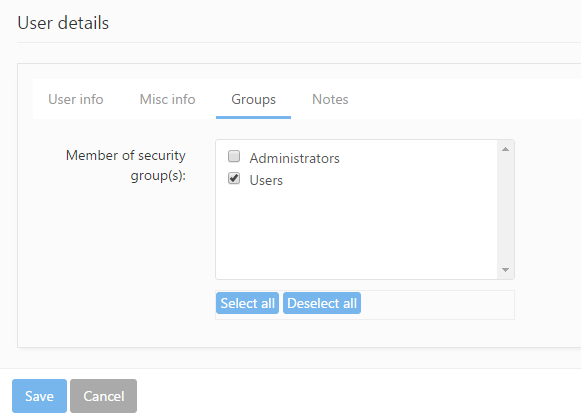
User’s groups tab
Notes
Notes and comments about the user may be added here. The notes added to this panel will be listed in reverse chronological order together with their date of creation, so that the history of communication related to the user can be easily overviewed.
A new note may be added by typing it in the text field at the bottom of the form. After hitting Save note, the note appears on the top of the list. Notes can be edited with the ![]() icon and can be deleted using the
icon and can be deleted using the ![]() icon. PIRO Fusion users can only edit and delete their own notes, and the delete and edit icons are not available for notes added by other users.
icon. PIRO Fusion users can only edit and delete their own notes, and the delete and edit icons are not available for notes added by other users.

Notes tab