Introduction
Item types represent the individual products, services, labors, components, or materials in your system. They serve as the building blocks of your inventory, each defined with unique attributes, configurations, and settings. These settings include descriptions, pricing, default vendors, images, and more, enabling precise tracking, management, and reporting.
Item types inherit many of their properties from their assigned item group, such as measure units, attributes (if set), and default behaviors. This structure ensures consistency while allowing further customization at the item type level. For example, while measure unit groups and custom attribute lists are defined at the item group level, individual item types can specify unique default values and descriptions.
Item types are versatile and can be used across various system functions, such as inventory, job orders, and invoices. They can be added, edited, or imported through different tools and interfaces, ensuring flexibility in their creation and management.
Creating Item Types
Item types can be created in several ways, offering flexibility to suit different workflows. Below are the available methods for creating item types:
- Using the “Create New” Button: The Create New button is located on the toolbar of the Item Types List. Clicking this button opens the Item Type Detail Form, where you can define the key values for the new item type, such as its group, name, SKU, and measure units. Additional fields may be displayed based on the selected item group settings.
- Import Tool: Use the Import Tool to bulk import item types. This option is available under Administration → Import Tool → Item Types. The import process is suitable for adding large quantities of item types efficiently.
- Shopify Sync: Synchronize item types from Shopify. This method requires additional setup and development attention to define the criteria for syncing. Shopify Sync is ideal for businesses using Shopify as part of their e-commerce operations.
- Quick Add Form: The Quick Add Item Type form is accessible via Add New → Quick Add Item Type. This form offers a simplified interface for creating basic item types quickly, without requiring detailed configuration.
- Item Type Wizard: The Item Type Wizard is a visual and guided tool for creating item types. It is accessible via Add New → Item Type Wizard or the Wizard Wand icon, which is available on the Item Types List toolbar and in other forms like Add Job Order Item. The wizard is especially useful for creating more complex item types or when visual input is preferred.
Item type: Main info
Default Fields (Always Visible)
These fields are always visible when adding a new item type, regardless of the item group:
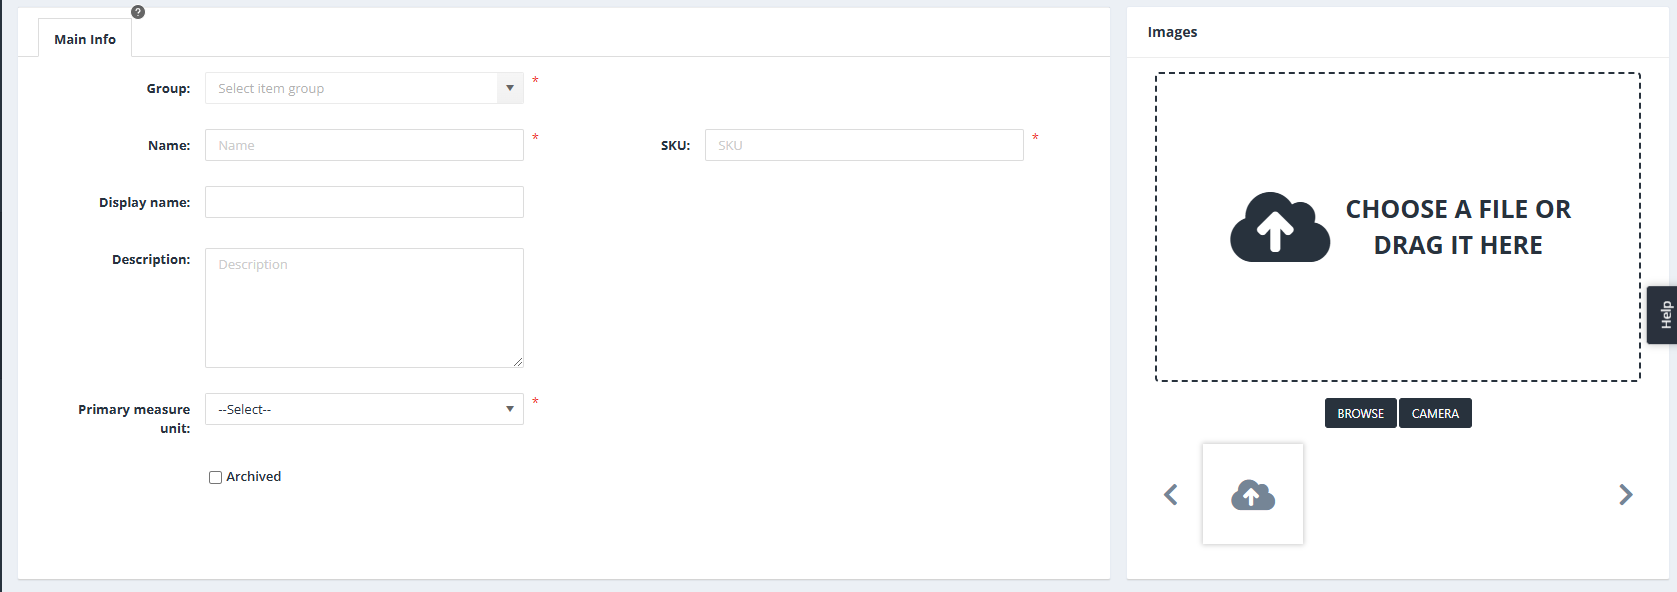
- Group: Select the item group to which the item type will belong. The group determines default settings and inherited attributes.
- Name: Enter the name of the item type.
- SKU: Specify the SKU for the item type. If the Item type SKU is auto-generated option is enabled in the item group settings, the SKU will be automatically generated based on the defined formula.
- Display Name: Provide a user-friendly name for the item type, useful for displays or reports where the full name might be too long.
- Description: Add a description for the item type. If the item group settings enable auto-generated descriptions, the description will be pre-filled.
- Primary Measure Unit: This field defaults to the primary measure unit defined by the item group but can be changed to any unit from the same measure unit group.
- Archived: Use this checkbox to archive the item type, marking it as inactive while keeping its details stored in the system.
- Images: Add images to the item type. Multiple images can be uploaded, allowing a comprehensive visual representation.
Additional Fields (Visible Based on Item Group Settings)
The following fields are only visible if the selected item group is configured to enable them:
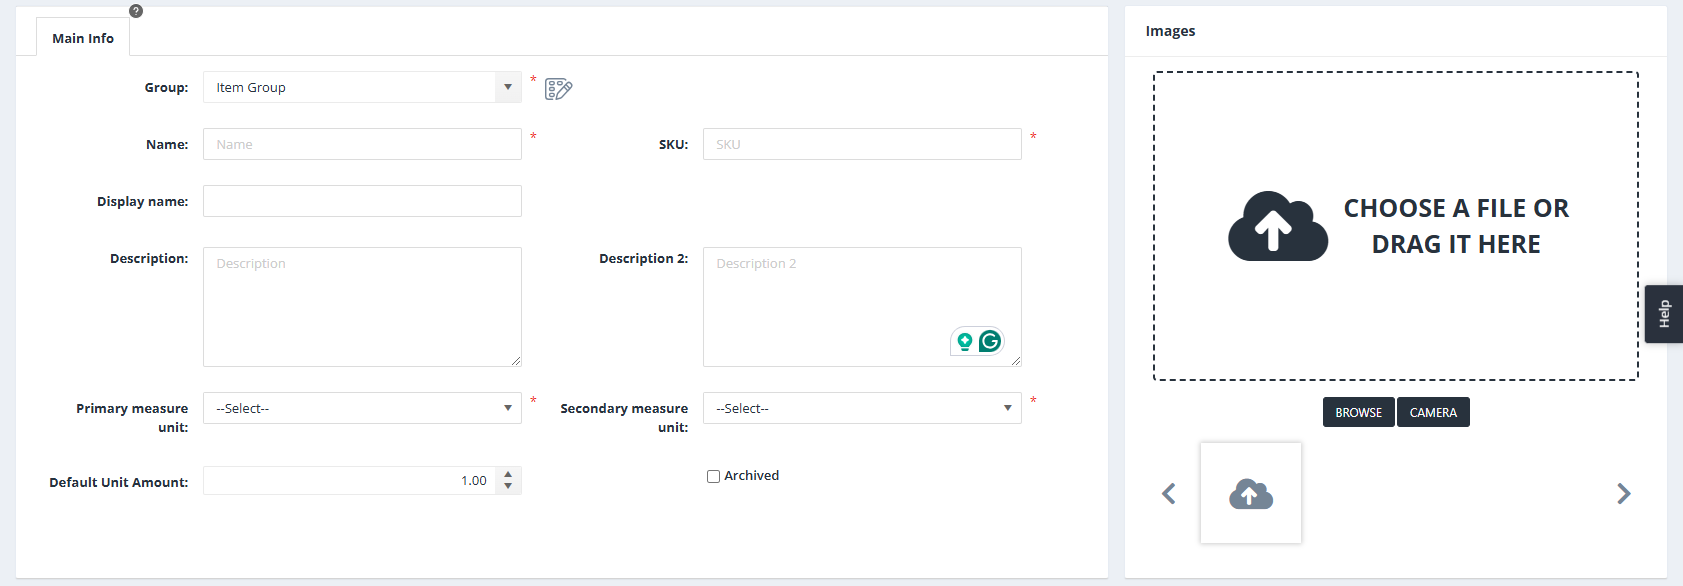
- Description 2: Appears if the Item types have Description 2 option is enabled in the item group settings.
- Secondary Measure Unit: Available if the Item types have secondary M.U. setting is enabled.
- Default Unit Amount: Appears if the Item types have unit amount option is enabled.
Additional Buttons

- Edit Item Group: This button is visible next to the group selection list only if an item group is selected.
-
- Functionality: Opens the Item Group Details form, allowing users to view or edit the settings of the currently selected item group.

- Open Current Inventory: Opens the Current Inventory tab in a new window. The Item Type filter on that tab is automatically pre-selected with the current item type, allowing users to view its inventory details directly.

- Generate SKU: This button is visible only if the Item Type SKU is Auto Generated option is enabled in the item group’s settings.
- Functionality: Generates a new SKU for the item type based on the formula defined at the item group level. Useful for maintaining consistent SKU patterns across item types.
Special Fields for Metals (Pure Metals and Alloys)
If the selected item group is designated for metals – Pure metals (MET) or Alloys (ALL) -, the following additional fields will be visible:
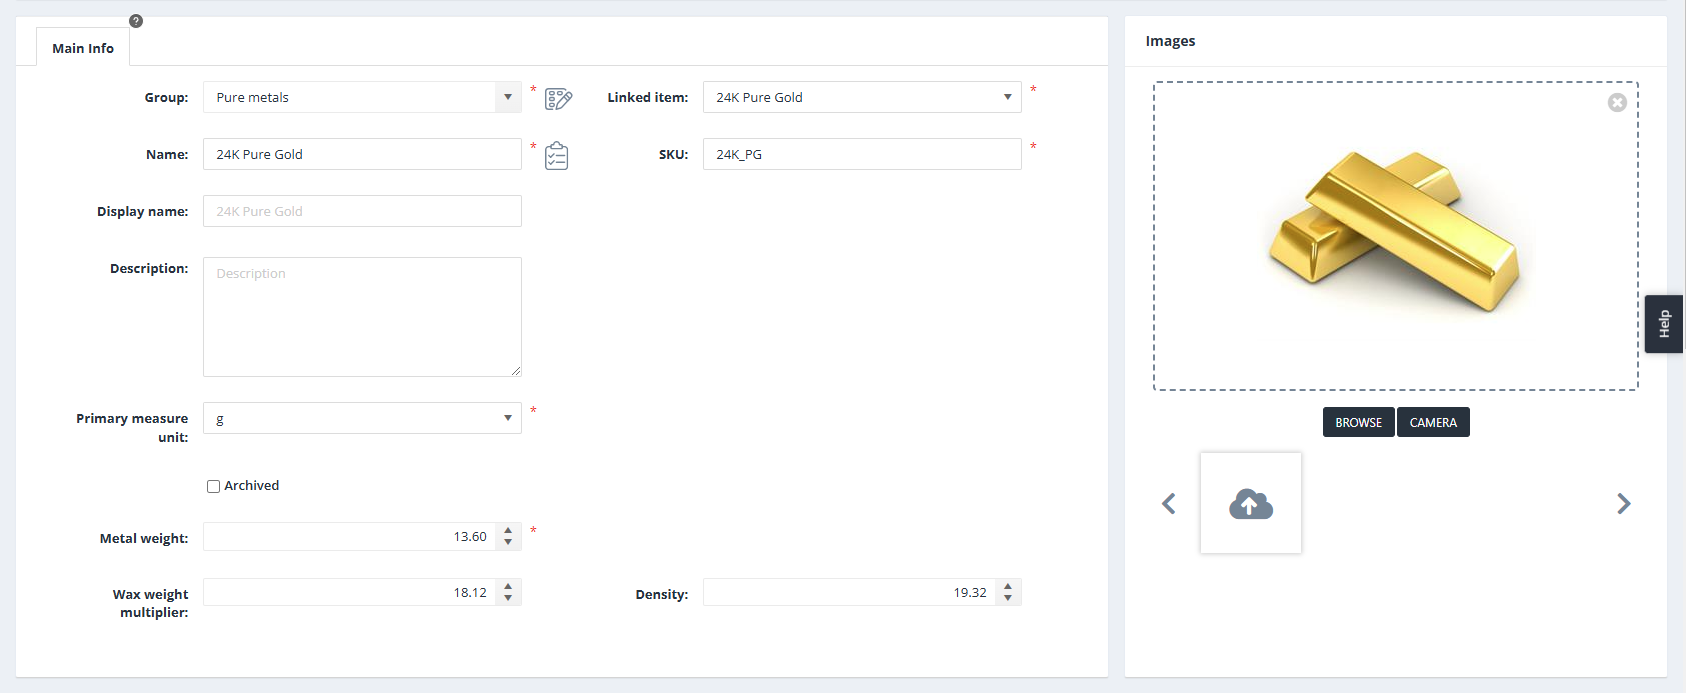
- Linked Item: Specify another item type linked to this item type. (?)
- Metal Weight: Define the weight of the metal. (?)
- Wax Weight Multiplier: Enter a multiplier used to calculate the wax weight of the item. (?)
- Density: Specify the density of the material. (?)
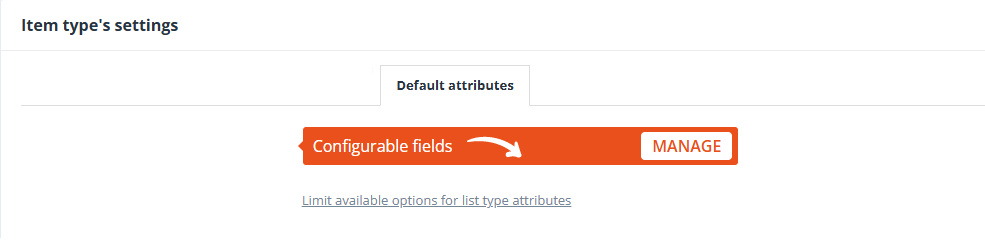
Item type: Item type’s settings
Price & Cost
The Price & Cost tab is designed to configure how an item type’s cost and prices are calculated and displayed in the system. It provides options for setting cost calculation methods, applying markups or discounts, and defining pricing strategies. This flexibility ensures that item costs and prices align with various business models and industry-specific requirements.
Users can choose from different calculation methods, such as fixed costs, component-based costs, attribute-based costs, or market-based calculations (e.g., for metals). Markups or discounts can be applied as flat fees or percentages, influencing the item’s sales and total prices.
Additional options like labor charges and quantity discounts provide further customization to pricing. Labor charges can be added to the item’s sales price to compute the total price, while quantity discounts enable dynamic pricing based on order volume thresholds.
This tab ensures precise and adaptable cost and pricing management, catering to diverse business needs.
Cost
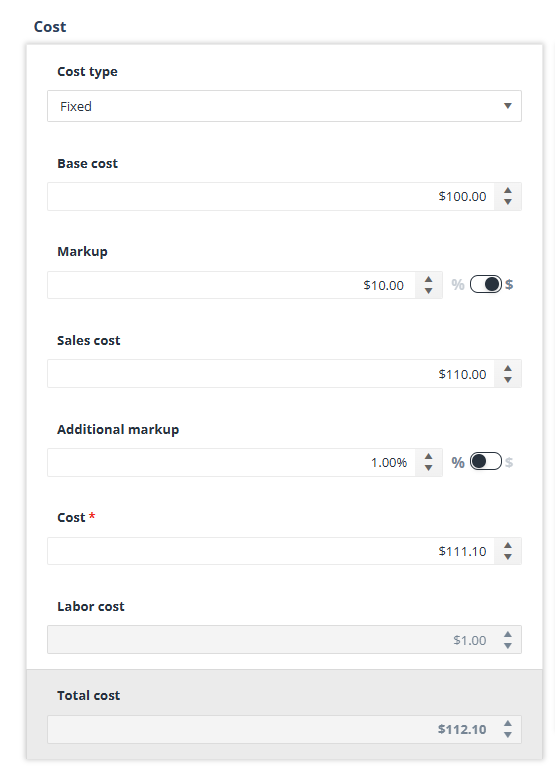
Fields in the Cost Area
- Cost Type
Specifies the method used to calculate the item’s cost. The following options are available:- Fixed: The cost is a predefined, unchanging amount.
- Component Based: The cost is determined by summing the costs of the item’s subitems (components).
- Attribute Based: The cost is calculated based on specific attributes defined for the item type.
- Market Based: The cost is determined dynamically based on market data (e.g., material price fluctuations).
- Base Cost
Defines the initial cost of the item before applying any adjustments or markups. - Markup
Adds a profit margin or discount (if the entered value is negative) to the Base Cost. Markup (or discount) can be defined in one of two ways:- Percentage (%): The markup is calculated as a percentage of the Base Cost.
- Flat Fee ($): A fixed dollar amount is added to the Base Cost.
- Sales Cost
Represents the sum of the Base Cost and the Markup. - Additional Markup
Works similarly to the Markup field, allowing either a percentage or flat fee. This field was added to accommodate cases where both types of markups are required. For example, a percentage markup may represent standard profit margins, while a flat fee could account for fixed operational costs. Negative values can also be entered here to apply a discount. - Cost
Represents the intermediate calculated cost of the item after applying the Base Cost, Markup, and Sales Cost adjustments. - Labor Cost: This field is visible only when the Includes labor charge checkbox is enabled in the Sales Price area and at least one labor type is selected in the Labor Type(s) section. It displays the total costs of all selected labor types.
- Total Cost
Shows the final cost of the item, calculated by combining the Base Cost, Markup(s), and any additional adjustments, including Labor Cost.
Sales price
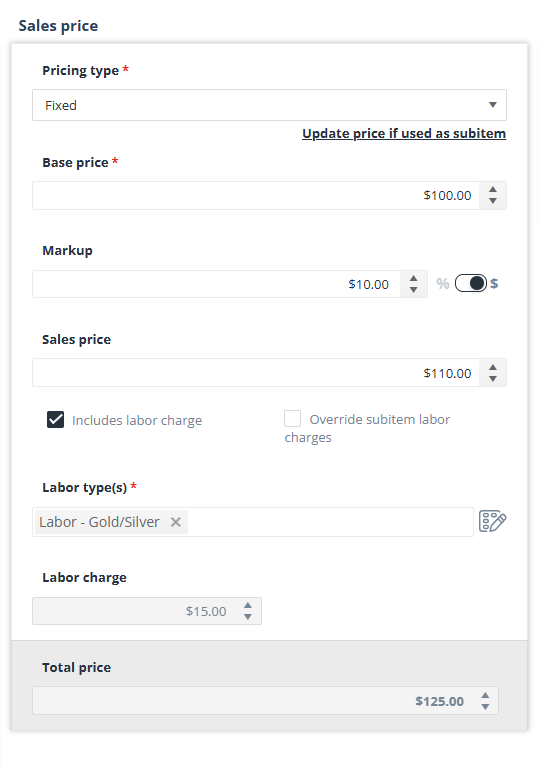
Fields in the Sales price area
- Pricing Type: Specifies the method for calculating the item type’s base price. The available options are:
- Fixed
- A manually set value entered as the Base Price.
- Market Based
- Automatically calculated based on metal market data.
- Commonly used for metals to reflect dynamic pricing based on market fluctuations.
- Component Based
- Derived from the total price of the item type’s subitems (components).
- Each subitem’s Total Price contributes to calculating the base price of the main item type.
- Attribute Based
- Determines the base price based on the item type’s attribute values.
- Note: If this option is selected, two additional icons will appear next to the Pricing Type selection list:

- “Manage Item Group Attribute Based Prices”
- “Manage Item Type Attribute Based Prices”
Clicking either icon opens the Attribute Based Price List form. The key differences are:
- Item Group Attribute Based Prices: Allows defining cost, price, and retail price for various attribute variations at the item group level. These settings apply to all item types within the group.
- Item Type Attribute Based Prices: Enables setting attribute-based price variations for the specific item type only, overriding group-level settings.
- Cost Based
- Calculated using the item type’s Total Cost (from the Cost area), including any applied markups or discounts.
- Fixed
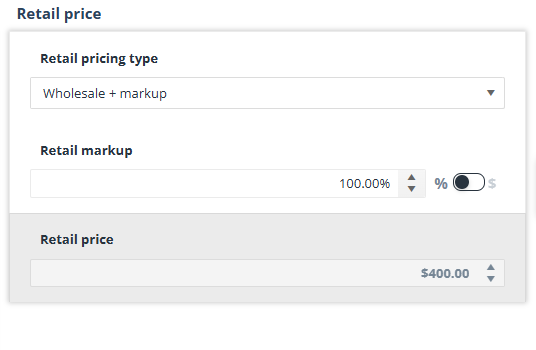
- Base Price
Displays the initial price based on the selected Pricing Type. - Markup
An additional percentage (%) or flat fee ($) added to or subtracted from the Base Price. Negative values apply a discount. - Sales Price
The calculated price based on the selected Pricing Type and the Markup. (Base Price + Markup) - Includes Labor Charge
A checkbox that, when enabled, includes labor charges in the item’s sales price.
When checked, the following additional options appear:- Override Subitem Labor Charges: Checkbox to ignore labor charges from subitems and only apply the selected labor types. (?)
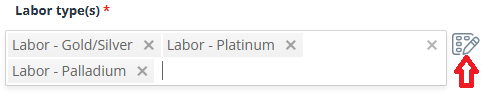
- Labor Type(s): A multi-select field to add one or more labor types to the item.
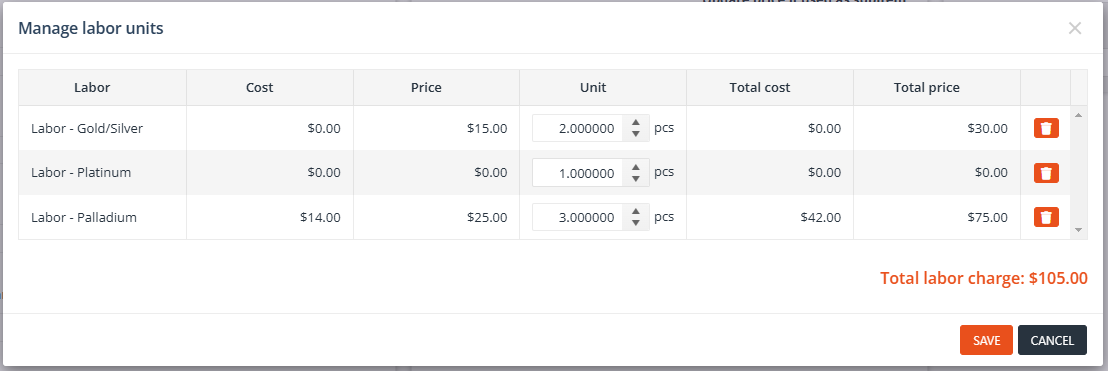
- Labor Charge: Displays the total price of all selected labor types.
- Total Price
The final sales price of the item, calculated as: Sales Price + Labor Charge(s)