
New vendors can be added by clicking the Create new vendor button or using the ![]() icon, which will bring up the Create vendor form.
icon, which will bring up the Create vendor form.
 |
|
The vendor related information is specified in multiple sections which are described in detail below.
General info
In the General info section the basic information about the vendor can be specified. The fields displayed in this section vary depending on the vendor’s type (defined in the Type field):
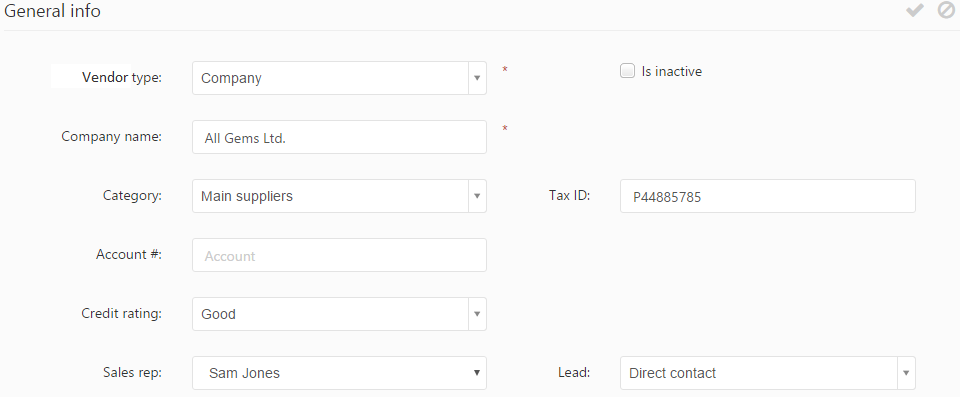
Example of General info section
- Vendor type: specifies whether the vendor represents a company or a person.
- Is inactive: ticking this check-box sets the vendor to be inactive, meaning the vendor will not be shown by default on the vendor list. Users are not allowed to perform any actions on inactive vendors, however the vendor information will be kept in PIRO Fusion and they can be set as active vendors again at any time. Inactive vendors can be viewed by setting the “Show” filter to “Inactive” via the expandable filter panel and then applying hte filter.
- Company name: specifies the name of the company (this field is shown only if you selected Company in the Type field).
For Person type vendors the following fields are displayed instead of the Company name field:- Title: specifies the title (e.g. Dr., Mr., Ms., etc.) of the vendor.
- First name: specifies the first name of the vendor.
- Last name: specifies the last name of the vendor.
- Middle name: specifies the middle name of the vendor.
- Gender: specifies whether the vendor is male or female.

Example of the General info section
- Category: assigns the vendor to the specified vendor category.
- Tax ID: specifies the tax ID of the vendor.
- Account #: displays the automatically generated account number used to identify the vendor. This information is read-only.
- Credit rating: specifies the credit reliability of the vendor. The available ratings in PIRO Fusion are the following: Excellent, Good, Fair, COD only, Caution and Hold.
- Sales rep: assigns the specified sales representative to the vendor. Only users who have the Customer sales representative check-box ticked on their User’s detail form. are displayed in this field.
- Lead: specifies how the vendor’s lead was generated.
Main address
The address specifies in this section will serve as the main address of the vendor and will be displayed on the vendor list.
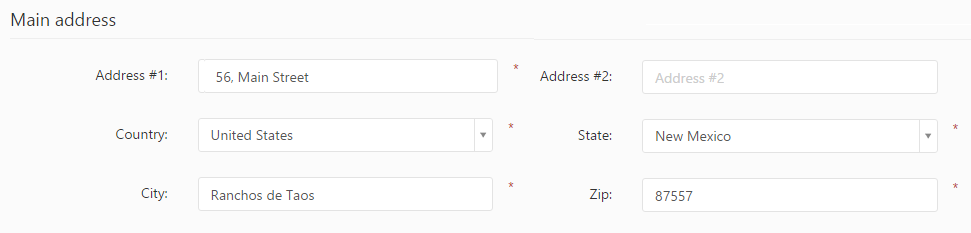
Main address section
- Address #1: specifies the first part of the vendor’s address (this will be shown on the vendor list).
- Address #2: specifies any additional information needed to complete the vendor’s address (such as floor number, apartment number, etc.).
- Country: specifies the country where the vendor is located. Specifying the country is mandatory.
- State: specifies state where the vendor is located.
- City: specifies the city where the vendor is located.
- Zip: specifies the postal (zip) code of the vendor.
Company contact / Contact
This section contains the main contact information of the vendor:
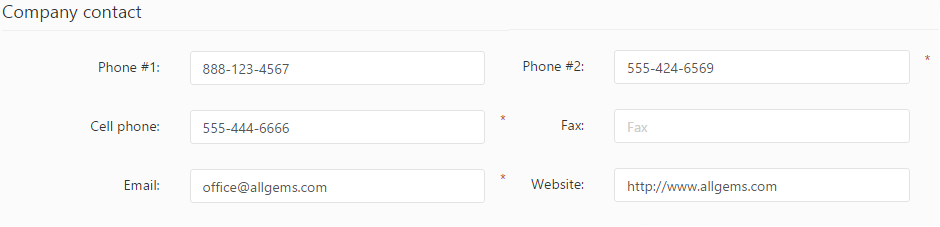
Company contact section
- Phone #1: specifies the main phone number of the vendor.
- Phone #2: specifies the second phone number of the vendor.
- Cell phone: specifies the cell phone number of the vendor.
- Fax: specifies the fax number of the vendor.
- Email: specifies the email address of the vendor. Emails and notifications will be sent to this email address.
- Website: specifies the website of the vendor.
Financial settings
In this section information related to the vendor’s financial and inventory settings can be specified.

Financial settings section
- Global discount: specifies a custom discount rate that will be applied to the value of all purchase orders created for the vendor.
- CC markup: specifies a markup that will be applied whenever the vendor makes a credit card payment.
- Default payment type: specifies the payment type usually used by the vendor.
- Shipping price: specifies a custom shipping price which will be used for this vendor.
- Default payment term: specifies a payment term that will be used by default on job orders created for the vendor.
- Default shipping method: specifies a shipping method which is typically used by the vendor.
- Credit line: specifies the maximum amount of credit allowed for the vendor.
Shipping info
When the shipping and billing address are the same then the Shipping info (if different than main address) option can be unchecked to prevent users from having to specify the shipping address separately. If this option is checked then a Shipping info section will be displayed on the form where the the vendor’s shipping address(es) can be specified.
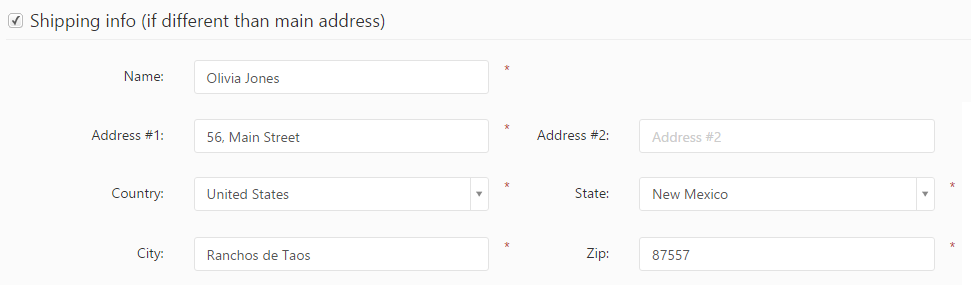
Example of the Shipping info section
Billing info
This section is used to specify the vendor’s billing and credit card information which can then be used in PIRO Fusion on the vendor’s purchase orders.
The following information can be specified in this section:

Example of Billing info section
- Billing address differs from main address: If this option is unchecked then the same address will be used for billing as the one specified on the General info tab. Enabling this option brings up the Billing info section where separate billing information may be specified.
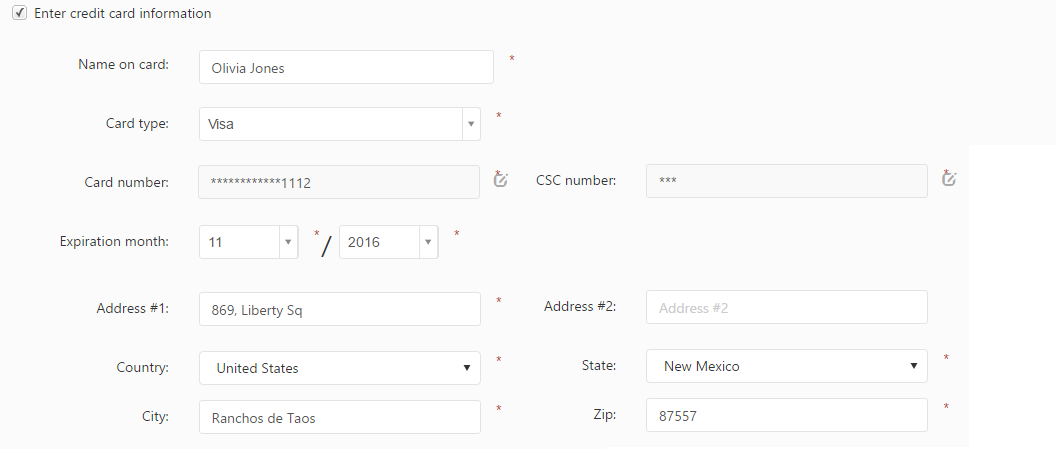
Enter credit card information
- Enter credit card information: Enabling this option allows users to specify the vendor’s credit card information.
- Name on card: specifies the name of the credit card owner.
- Card type: specifies the type of the credit card (Visa, MasterCard, etc.).
- Card number: specifies the credit card number.

This field is read-only by default. Use the
 icon to add the credit card number. The credit card number is saved using the
  icon after typing it in.
- CSC number: The Card Security Code is specified similarly to the credit card number:

Using the
icon will make the information editable. After typing in a valid CSC number, the information is saved using the icon. - Expiration month: specifies the expiration date of the credit card. The month can be selected from the first list and the expiration year from the second list.
- Address #1: specifies the first part of the credit card holder’s address.
- Address #2: specifies any additional information needed to complete the credit card holder’s address (such as floor number, apartment number, etc.).
- Country: specifies the country of the credit card holder.
- State: specifies the state of the credit card holder.
- City: specifies the city of the credit card holder.
- Zip: specifies the postal (zip) code of the credit card holder.
Contact person info
In this section the information related to the contact persons of company type vendors can be specified. The section consists of two tabs: Default and All.
Default tab
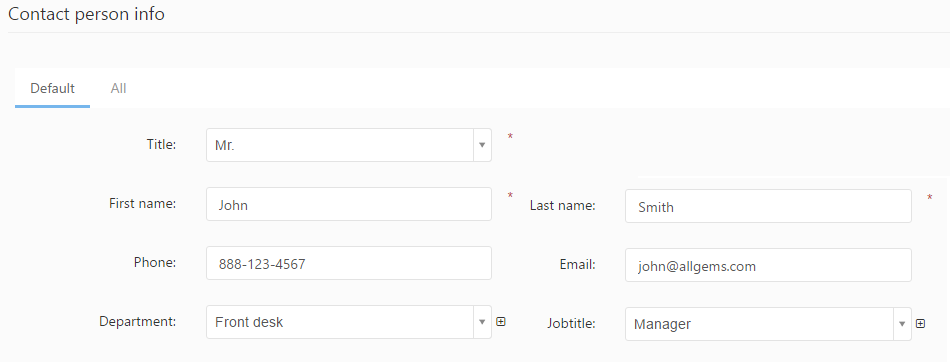
Example of the Default tab
On the Default tab the information related to the vendor’s default contact person can be specified:
- Title: specifies the title of the contact person (e.g. Mr., Mrs., Dr., Jr.).
- First name: specifies the first name of the contact person.
- Last name: specifies the last name of the contact person.
- Phone: specifies the phone number of the contact person.
- Email: specifies the email address of the contact person. Auto emails and notifications will be sent out to this email address if the contact person is among the recipients.
- Department: specifies the department where the contact person works (e.g. sales, marketing, etc.). Departments can be managed by clicking the
 icon next to the field which brings up the Departments window:

Department managementNew departments can be created using the Create new and then specifying the name in the Name field and afterwards clicking the
 icon. Existing departments can be edited using the icon. Departments can also be deleted by clicking the
  icon.
icon. - Jobtitle: specifies the job title of the contact person. Job titles can be managed by clicking the icon next to the field which brings up the Job titles window:

Job title managementNew job titles may be added using the Create new button and then specifying the name in the Name field and afterwards clicking the
icon. Existing job titles can be edited by clicking the icon. Job titles can also be deleted by clicking the icon.
All tab
All the contact persons (default and non-default) assigned to the vendor are listed on this tab.
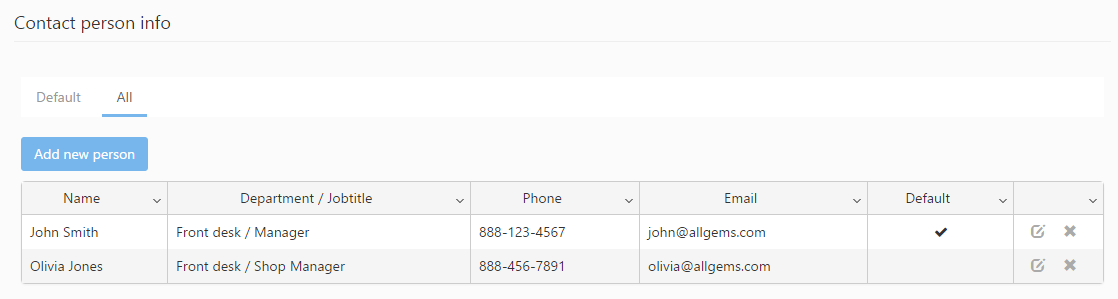
Example of All tab
A new contact person can be added by clicking the Add new person button which brings up the Add contact person form.

Example of Add contact person
A contact person can be edited by clicking the ![]() icon and deleted by clicking the
icon and deleted by clicking the ![]() icon.
icon.
For further information about the fields from this form please see the description of the Default tab in the Contact person info section.
Preferences
The Preferences section offers a flexible way to show any additional information that could be useful to users about the vendor. The fields in this section represent the attributes belonging to a custom attribute list that is assigned to the vendor profile. The content shown in the image above represents only an example of different attributes and is not content that PIRO Fusion provides by default. The available fields are fully customizable as PIRO Fusion users can select any of the custom attribute lists assigned to vendors and can also determine the attributes that the list contains (which ultimately determine the content that is shown in the Preferences section).

Example of Preferences section
Customizing the attribute list assigned to vendor profiles.
Specifying the custom attribute list assigned to vendor profiles can be via the Custom attributes management menu, double-clicking the vendors row from the grid and creating a new attribute list from Vendor preferences. Only Customer/Vendor extra attributes type attributes are shown on this form (this value is selected in the Type field on the Custom Attribute list details form).
Adding new attributes to the attribute list which will be associated to vendor profiles can be done by selecting the Custom attributes management menu, selecting the custom attribute list and then clicking the Add attribute button. For further details on these settings please see the chapter about the Custom attributes management menu.
Attributes can be deleted from the custom attribute list’s grid using the ![]() .
.
Misc info
This section includes miscellaneous information about the vendor. The following fields are available:

Example of Misc info section
- Notes: specifies any custom information about the vendor (Vendor specific pricing, etc.).
- Warning notes: specifies a warning message that will be shown for a short time when certain actions are performed by users on orders belonging to the vendor. Warning messages can be shown when creating or editing the vendor’s job orders or when creating an invoice for the vendor. Enabling the Show warning messages when editing job order option will bring up an additional Show warning message on first edit action only sub-option. Enabling the sub-option will display the warning message only once per job order, when the job order is edited for the first time. The time and actions when the warning message is displayed can be customized by ticking the check-boxes assigned to each option next to the Warning notes field.
Warning messages will be displayed in a textbox in the bottom-right corner of the screen when the selected actions are performed and will disappear after a few seconds.
Notes
The Notes section can be used by users to specifying multiple brief notes about the vendor. While the Notes section from the Misc info tab is mainly used for adding general notes about the vendor, this panel could prove useful by providing a way for users to communicate with each other by leaving comments related to the vendor. The user notes added here are listed in a reverse chronological order of their creation date such that the communication history related to the vendor can be easily overviewed.
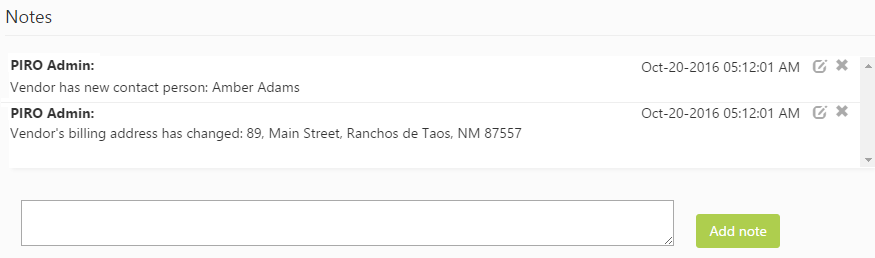
Example of Notes section
New notes can be added by typing in the text at the bottom of the form. After saving the note via the Add note button, the new note is immediately displayed at the top of the list. The notes can be edited using the ![]() icon or deleted using the
icon or deleted using the ![]() icon. PIRO Fusion users can only edit and delete their own notes. The delete and edit icons for notes added by other users will not be available.
icon. PIRO Fusion users can only edit and delete their own notes. The delete and edit icons for notes added by other users will not be available.
Deleting and editing a vendor
Vendors can be deleted by select the vendor from the vendors’ list and then using the ![]() icon. A confirmation dialog is brought up afterwards asking the user to confirm deleting the vendor; Confirming the dialog using the Yes option will delete the vendor from PIRO Fusion. We’d like to remind users that vendors can also be made inactive, meaning that they will not be shown on the vendor list but their information will be kept in PIRO Fusion. Inactive vendors may be set to active at any time as opposed to deleting a vendor which will erase all its information from PIRO Fusion.
icon. A confirmation dialog is brought up afterwards asking the user to confirm deleting the vendor; Confirming the dialog using the Yes option will delete the vendor from PIRO Fusion. We’d like to remind users that vendors can also be made inactive, meaning that they will not be shown on the vendor list but their information will be kept in PIRO Fusion. Inactive vendors may be set to active at any time as opposed to deleting a vendor which will erase all its information from PIRO Fusion.
Vendors can be edited using the ![]() icon from the vendor grid which will bring up the vendor’s detail form with all of the vendor’s profile information.
icon from the vendor grid which will bring up the vendor’s detail form with all of the vendor’s profile information.