
A job can start out either as a price quote (PQ) or as a job order (JO). A JO is the “container” that takes one or more job items (rings, earrings, molds, etc.) through the production steps needed for those items. A JO, throughout its life-cycle, can be split into suborders, can be assigned to casting trees. Also, several actions are available for a JO as it passes through the production processes, with each process also collecting information about the JO.
The Job orders tool shows a list of existing job orders in the system and provides filtering options for them.
Clicking on a job order in the list will open that job order’s detail form. Job order is the basic unit of the production system of PIRO Fusion. JO’s can be created by either converting a Price quote (PQ) into a JO or by creating a JO directly using the Add job order option button in the navigation bar’s Production menu. Once a JO is created, it serves as a container for the job items (the items that need to be produced) and routes these items through the services purchased by the customer.
The Create job order screen consists of the following sections:
Job order details
The JO’s main information need to be specified, such as:
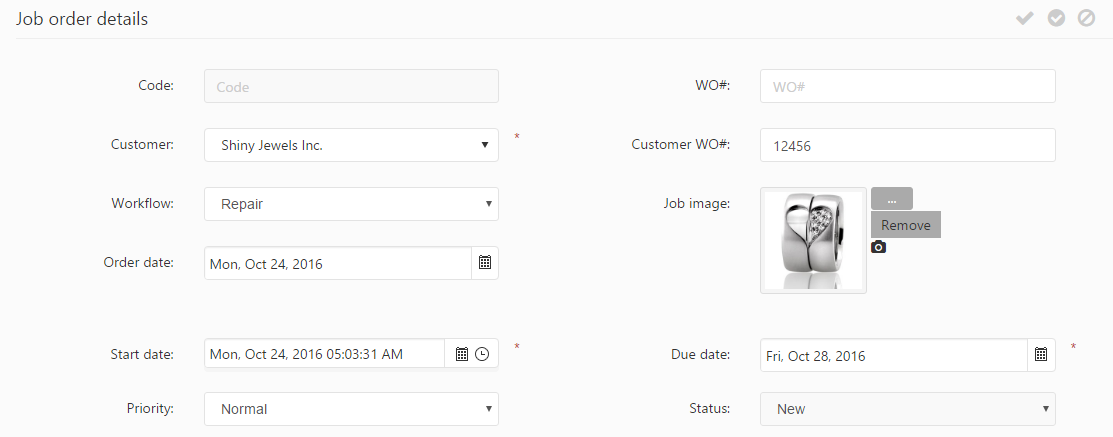
Job order details
- Code: This is an automatically generated unique system code, which identifies the job along the routing process. It will identify the Job order on the job envelope, and will be used for generating the envelope bar code as well.
- WO#: The Work Order number provided by an other accounting system.
- Customer: Select the customer who placed the order for the JO. The customer name can be selected from a dynamic selection list (you may opt to enter a few characters, the matching customer names will be listed, available for selection).
- Customer WO#: The Work Order number provided by the customer.
- Workflow: Select the JO’s workflow. Using these groupings the services requested can be easily added to the JO, instead of having to add them one by one.
- Order date: The date of creation of the job order.
- Job image: Allows uploading an image to the JO or to update the image. Image files can be uploaded by browse using the
 icon or from your webcam’s capturing folder (as set up in administration) using the
  icon.
icon. - Start date: The date and time when the job order is routed into production. The first service will start at this point, the start dates of the following services will be set based on this date and the duration of previous services.
- Due date: Shows the due date of the Job Order set by the handling user. By default it corresponds to the estimated finish date.
- Priority: This is simply a flag that marks a JO’s priority. When creating a job order, it is Normal by default. There are four additional options, which are listed in the dropdown-list: Low, Medium, Urgent and High Rush.
- Status: The current status of the JO, reflects the main stages of the Job order in the production process. This is a read-only field that will be updated automatically along the routing process. Job orders can have the following statuses:
- New: After creating the job order, its status will be New by default.
- Processing: Once the job order has been moved into production the New status will be changed automatically to Processing, and remain so during the production process.
- Finished: After the job order has finished its life-cycle (completed the last service of the workflow) the status will be changed automatically to Finished.
- On hold: The job order can be suspended using the Hold job order button, which is displayed under the job orders’ grid. It will be available for further use once reactivated with the Continue button.