
The Service history tab shows the services that the JO already went through and the user who worked on that service. Service parameters can be viewed from here as well by clicking on the Service details icon: ![]() .
.

JO’s service history tab
The service history specific columns are the following:
- Job order: This is the JO code.
- Service name: Displays the workflow’s service name, which is a link. Clicking it, the Service info’s form opens.
- Status: Shows whether the job order has finished the service or is currently processing the service.
- Effective start date: Shows the real date when the job order has entered the service.
- Effective finish date: Shows the real date when the job order has left the service.
- Proposed start date: Shows the proposed date when the job order should entered the service.
- Proposed finish date: Shows the proposed date when the job order should left the service.
- Weight on start (g): Shows the weight of item types measured when the job order has entered the service (if specified).
- Weight on finish (g): Shows the weight of item types measured when the job order has left the service (if specified).
- Service assigned to: Shows the handler user name who was responsible to the JO’s current service.
- Reason: Shows the reason of rejection, if the service has been rejected.
- Last updated by: Shows the user’s name who updated last time the JO’s service.
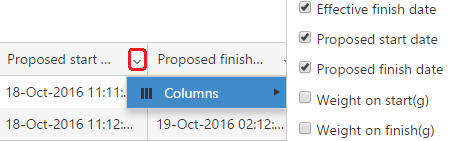
Using the column customization tool, you can hide and display the grids columns at will.
Status history
The Job status history tab displays the job status history, when the job’s status changes from New to Processing or to On hold simply it is finished, these are recorded in the current tab’s grid.
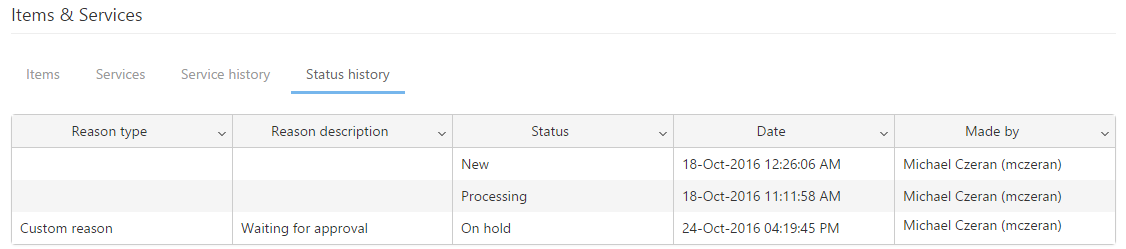
Job status history tab
The JO’s status history shows the job order code, the JO’s status, the status changes’ date and the user’s name who made the changes. The tab also displays the JO rejection’s reason in case of the job order was put on hold.
Actions
There are several actions that can be applied when routing the Job Order or modifying its attributes. These actions can be performed using the buttons or icons from the JO’s detail form or JO grid.
JO detail form – available actions


JO detail form – available actions
- The Edit button opens the JO detail form in edit mode, this way the fields become editable.
- Using the Delete button you can delete the job order.
- The Create new button opens the Create job order.
- The Route job action allows routing the Job Orders into the next service. If mandatory inputs need to be filled before routing the Job Order, a message window will appear and allow you to open Service detail form, where these inputs can be entered and saved.
If user assignment is needed for the next service, a message window will appear asking you to select a user for the relevant service. - The Quantities action opens the Enter item weight form that allows the insert or update of weights for items assigned to the job order.
- Clicking on Print envelope will open the Job order’s envelope, available for printing.
- The Copy action will create an identical job order to the selected one, by copying all the details filled when creating the job order.
- Using the Back to list button PIRO Fusion navigates to the JO grid.
JO grid – available actions
 |
 |
- The Copy job order action will create an identical job order to the selected one, by copying all the details filled when creating the job order. The status of the copy will be set to New (only the service history of the original job order will not be copied). This button / icons shows only when a job order is selected.
- The Hold job order action suspends the Job Order in its life cycle. After the status is changed to On Hold the Hold action toolbar will be replaced with Continue, that will allow the reactivation of the Job Order.