Sales Orders
Overview
The Sales Orders form is designed to help you create, manage, and convert sales orders efficiently. It consists of two distinct tabs: Orders and Items, each serving a specific purpose.
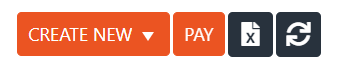
- Orders Tab: Displays all sales orders with their key details, enabling you to track and manage multiple sales orders simultaneously. From here, you can delete or print sales orders and export the data for reporting purposes.
- Items Tab: Lists all sales order items separately, allowing you to perform conversions such as generating job orders, purchase orders, or invoices. This tab is particularly useful for managing individual sales order items and their inventory impact.
Both tabs include powerful filtering options, accessible via the Filters button at the top-left of the form. Any filters applied using this button will affect the data displayed in both the Items and Orders tabs simultaneously. Additionally, you can refine your results further by using the column filters available within each tab. These allow for more precise filtering based on specific column values.
Filters
The Filters feature allows you to narrow down the displayed data in both the Items and Orders tabs. Filters can be accessed via the Filters button at the top-left of the form. This section provides detailed information on the available filtering options:
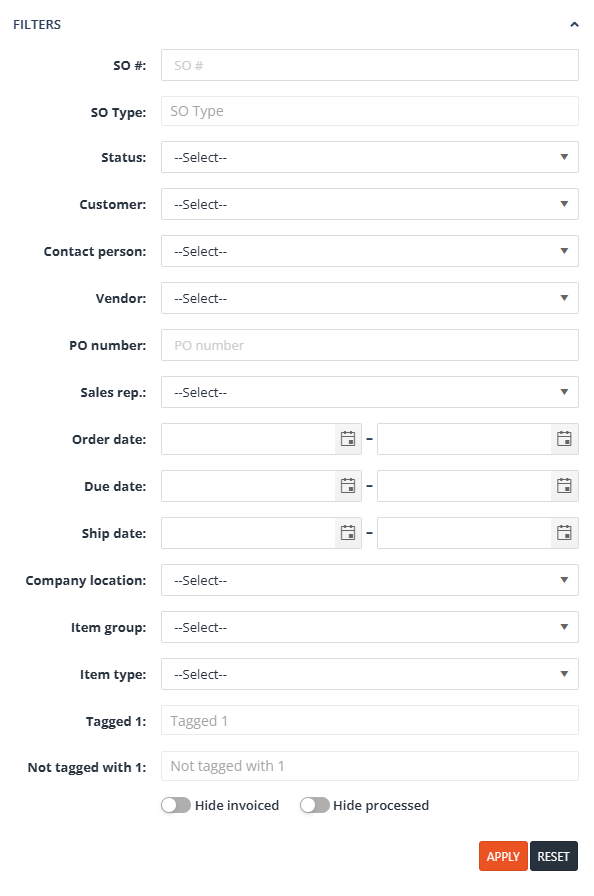
1. Main Filters
- SO#: Filter sales orders by their unique sales order number. Specifying a value here will also populate the corresponding quick filter.
- SO Type: A multi-select filter that lists all currently active sales order types. This list can be customized and expanded based on client requests, requiring support or minor development involvement to add new types.
- Status: Filter sales orders based on their current status.
- Customer: Narrow down sales orders by selecting a specific customer. Specifying this filter also updates the quick filters.
- Contact Person: Filter by the associated contact person for a sales order.
- Vendor: Display sales orders linked to a specific vendor.
- PO Number: Filter by purchase order (PO) numbers associated with sales orders. Specifying this filter also updates the quick filters.
- Sales Rep.: Show sales orders assigned to a particular sales representative.
- Order Date: A range filter allowing you to specify a start and end date to display sales orders created within the selected range.
- Due Date: A range filter for specifying the start and end dates for when sales orders are due.
- Ship Date: A range filter to select sales orders based on their shipping date range.
- Company Location: Filter by the company location associated with the sales order.
- Item Group: Show sales orders that include items from a specific item group.
- Item Type: Filter sales orders by item type.
- Tagged 1: A multi-select filter that searches sales orders based on the tags applied to them.
- Not Tagged with 1: A multi-select filter that excludes sales orders containing specified tags.
- Hide Invoiced: A toggle filter that, when enabled, hides sales orders with the “Invoiced” status.
- Hide Processed: A toggle filter that, when enabled, displays only sales orders with the “New” status.
2. Column filters
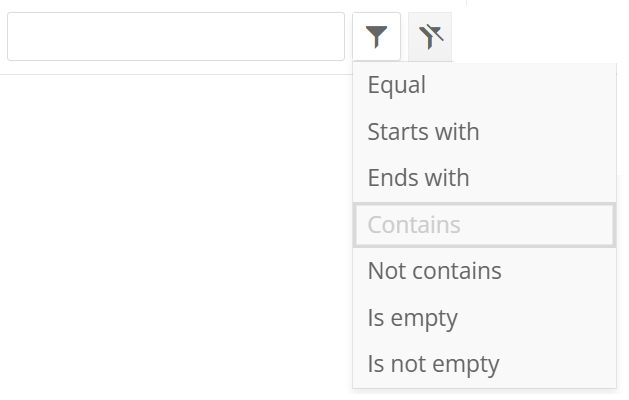
- Column Filters allow users to further refine their searches by applying specific criteria directly to individual columns. These filters are available on most columns, excluding ones where filtering is not applicable (e.g., the Image column).Each column filter consists of:
-
- A text area where users can input the desired text.
- A filter option dropdown located next to the text area, offering the following filtering options:
- Equal: Displays rows where the column value matches the input text exactly.
- Starts with: Displays rows where the column value begins with the input text.
- Ends with: Displays rows where the column value ends with the input text.
- Contains: Displays rows where the column value includes the input text.
- Not contains: Displays rows where the column value does not include the input text.
- Is empty: Displays rows where the column value is blank or null.
- Is not empty: Displays rows where the column value is not blank or null.